
Printing & QR orders
Connect a receipt printer
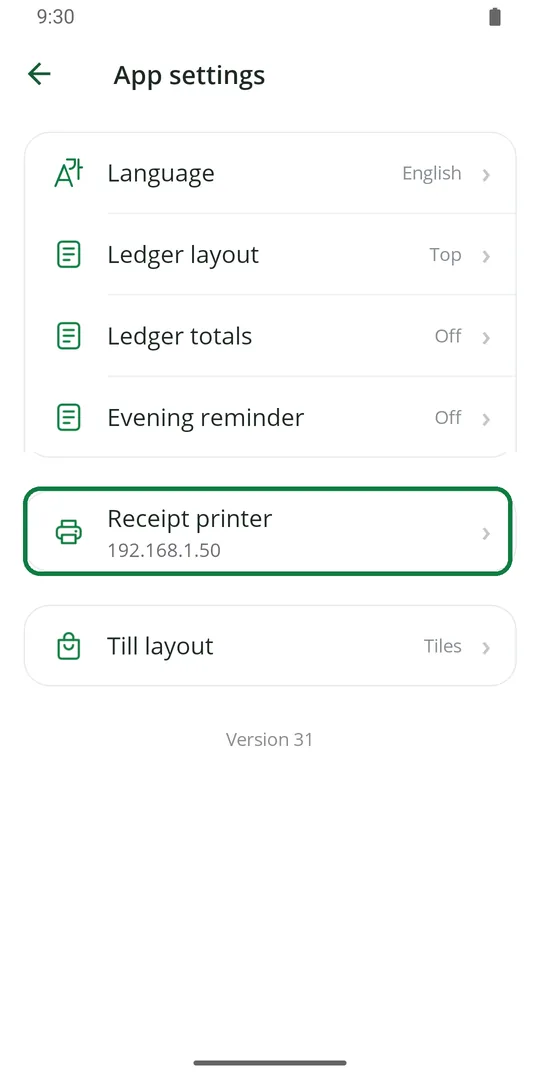
1Tap ☰, App settings, then Receipt printer 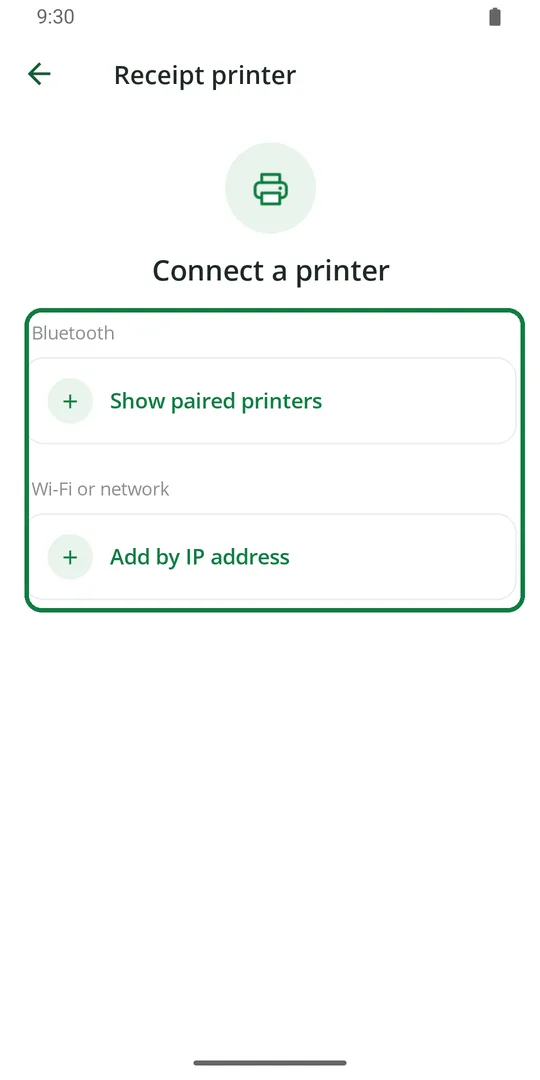
2Bluetooth printer? Pair it in the phone's settings first, then tap Show paired printers. Wi-Fi printer? Tap Add by IP address 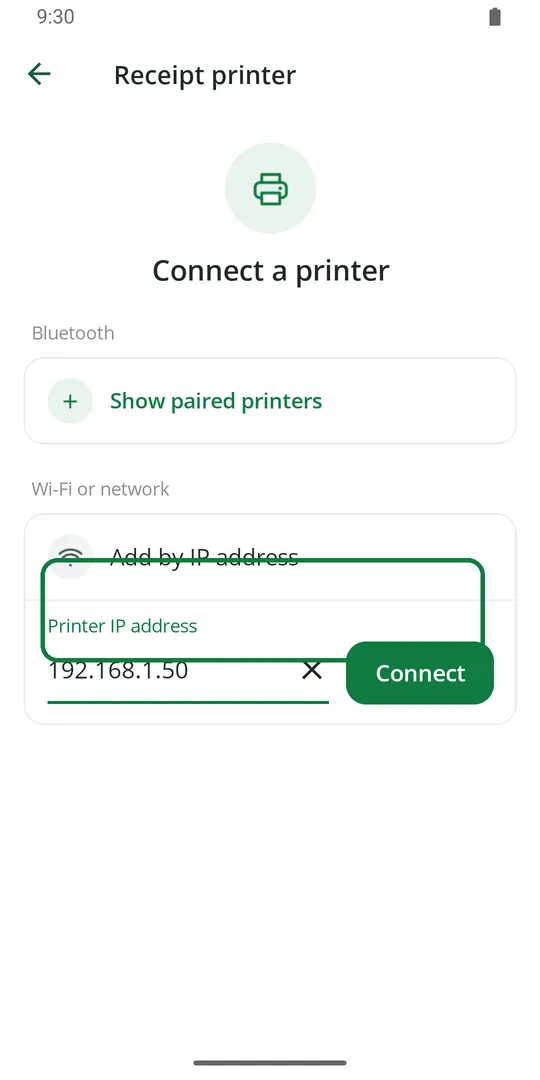
3Type the printer's IP address and tap Connect. A test receipt prints 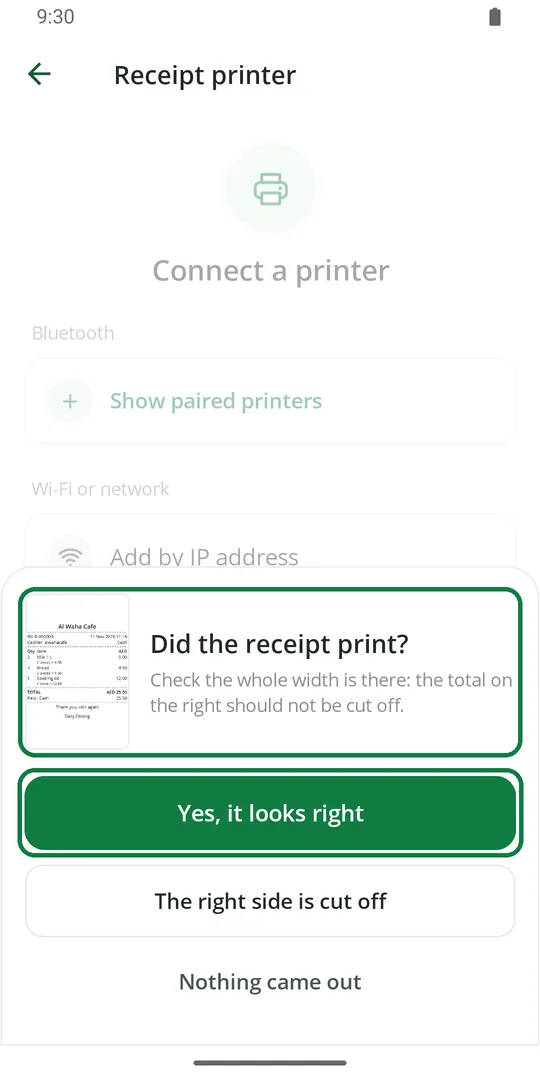
4Check the receipt and tap Yes, it looks right 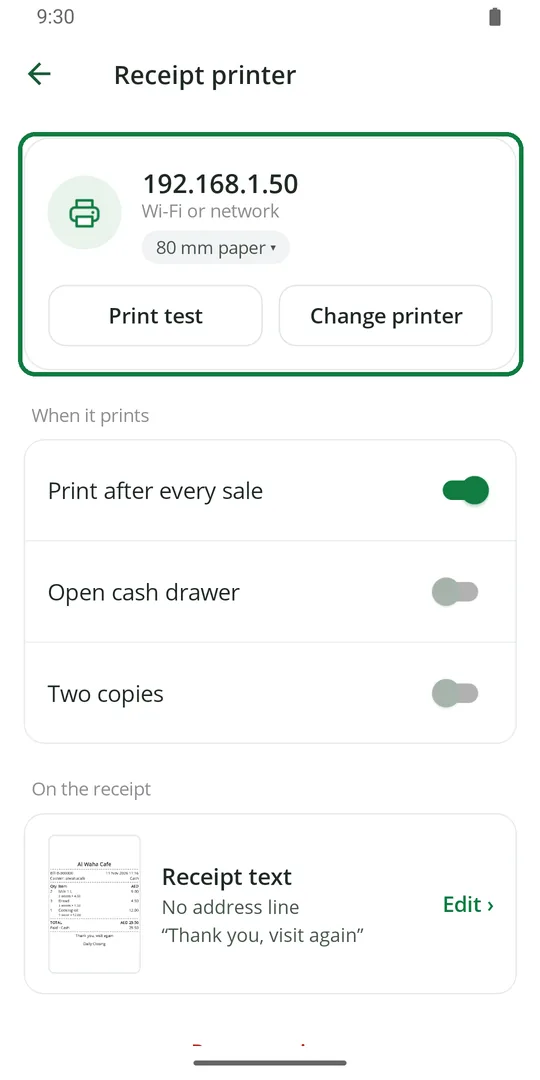
5The printer is set. Pick the paper size, 80 mm or 58 mm. Print test prints again
Not sure of the IP address? Most printers print it on their self-test page.
If the printer does not answer
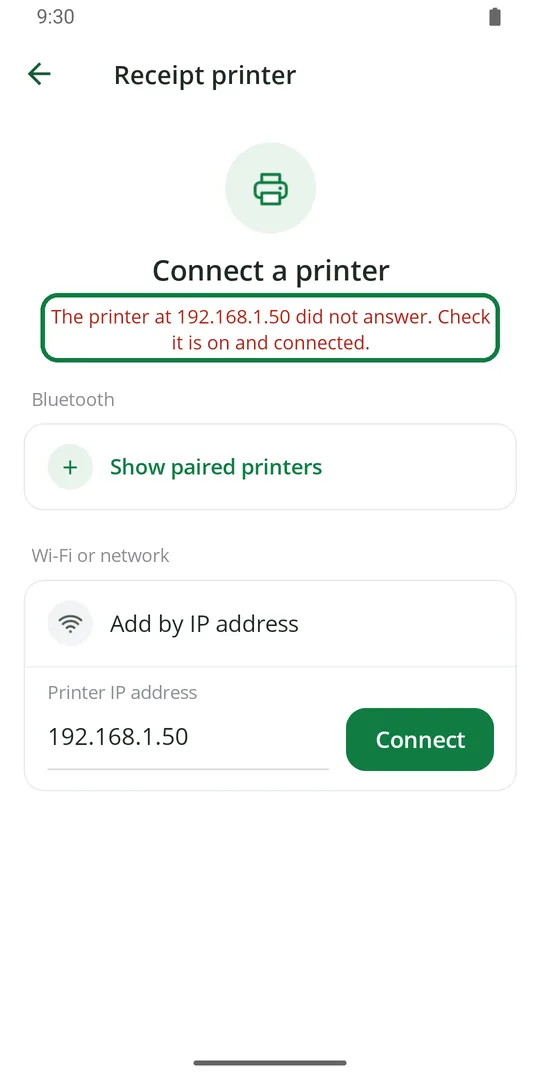
1Check the printer is on, has paper, and is on the same Wi-Fi as the phone. Then tap Connect again
Print a receipt for every sale
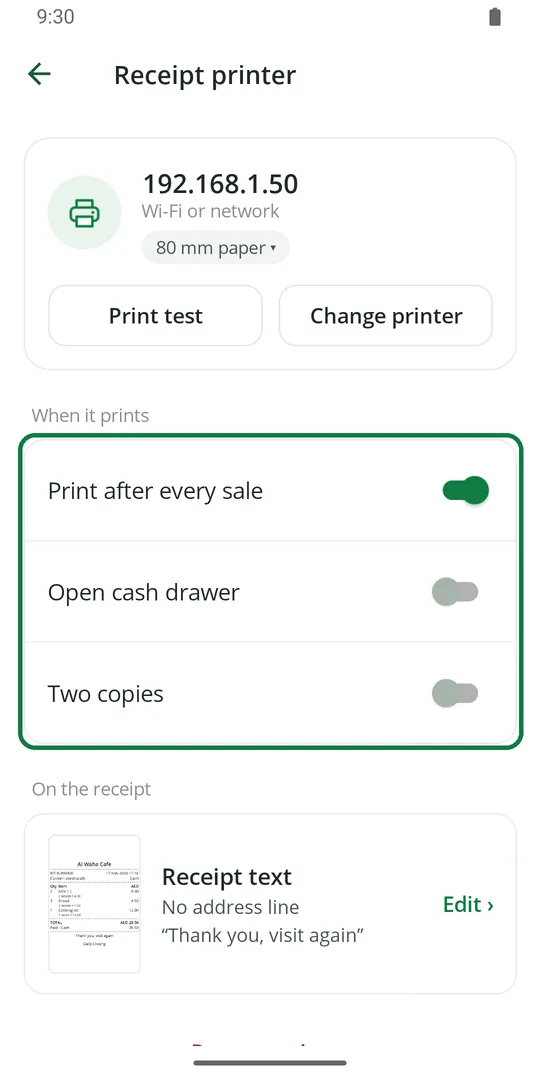
1In Receipt printer, switch on Print after every sale. Also Open cash drawer or Two copies if you want 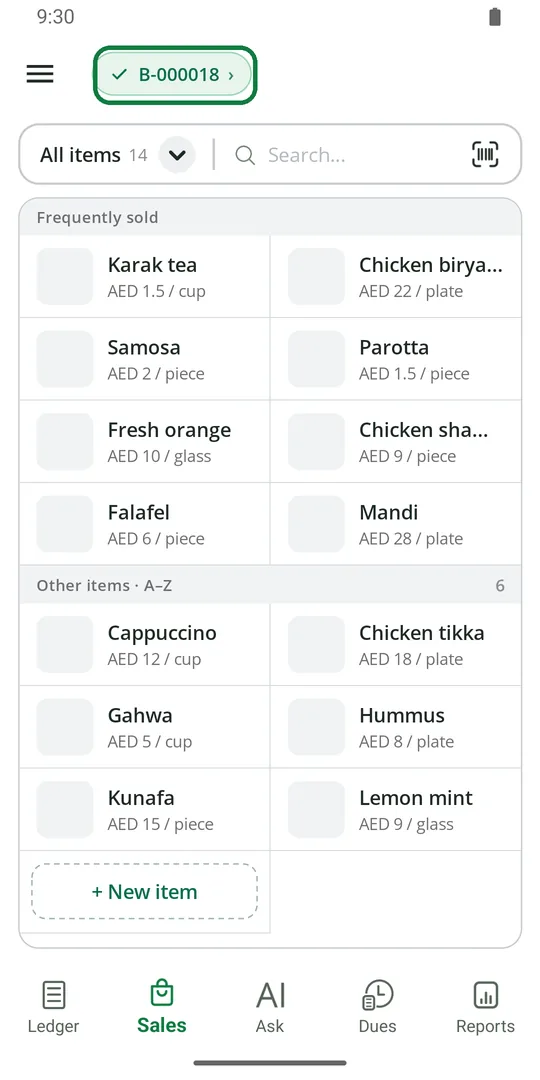
2Now each bill prints by itself when you tap Cash, Bank or Credit 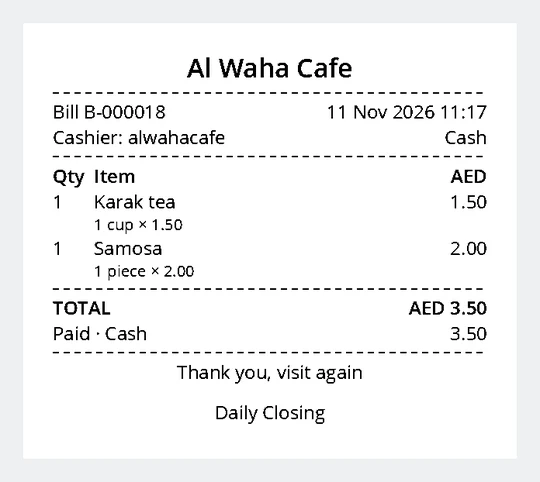
3The receipt shows your shop name, the bill number, items, total and how it was paid
Print a bill again
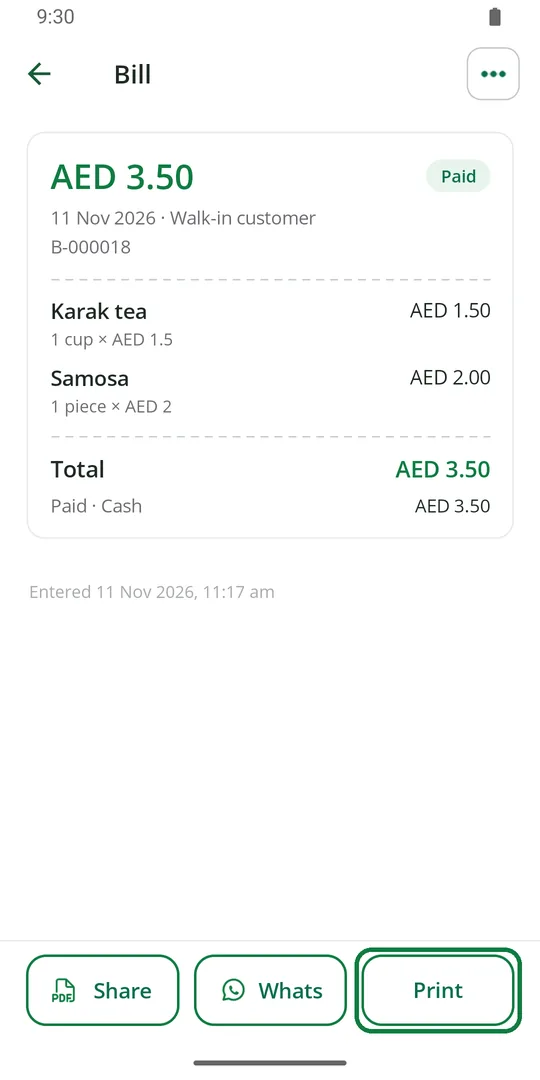
1Open the bill and tap Print
Print shows on a bill only after a printer is connected.
Put your address on the receipt
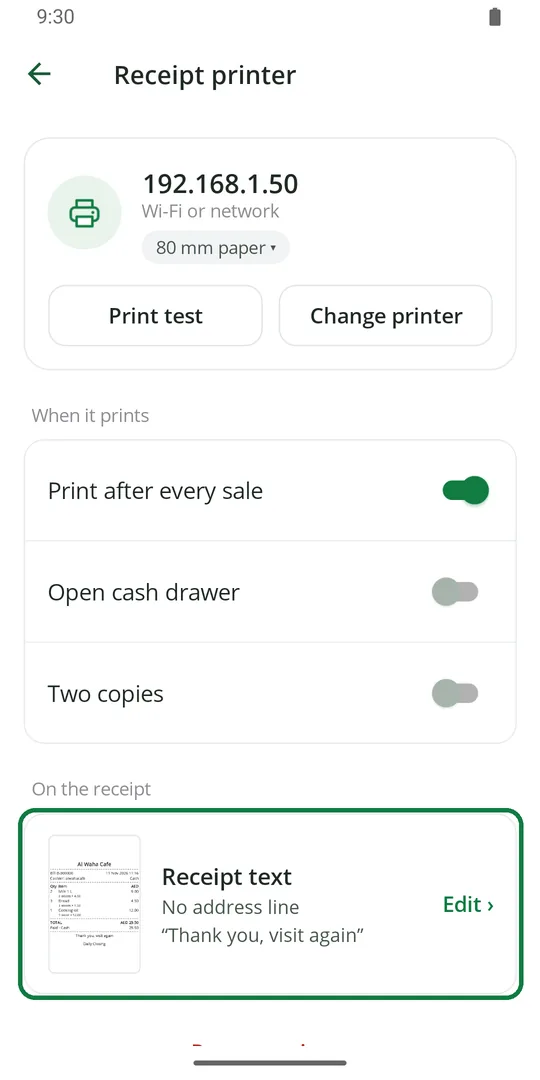
1In Receipt printer, tap Edit beside Receipt text 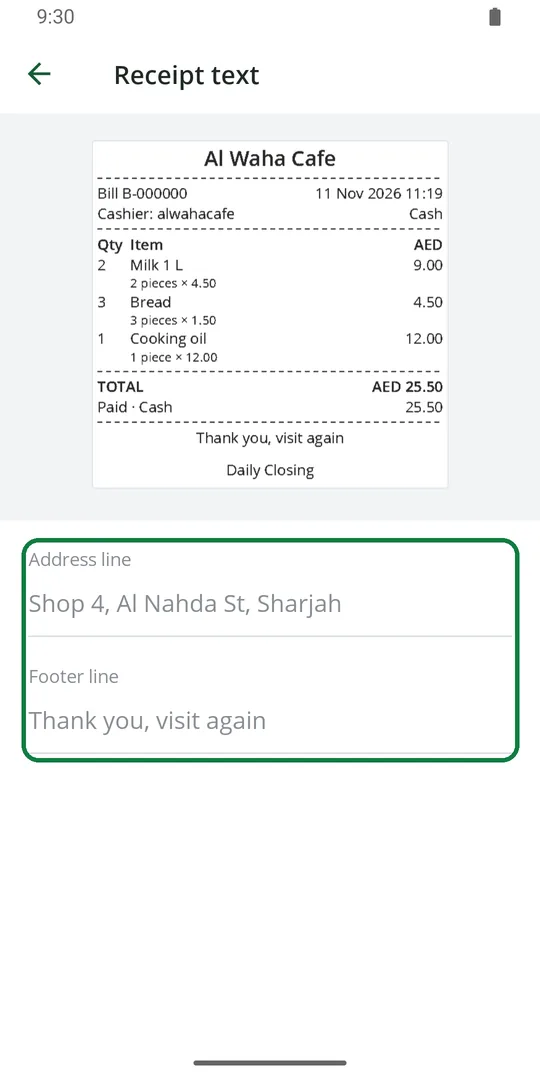
2Type your address and the last line, like a thank-you. The picture above shows how it will look
Let customers order from the table
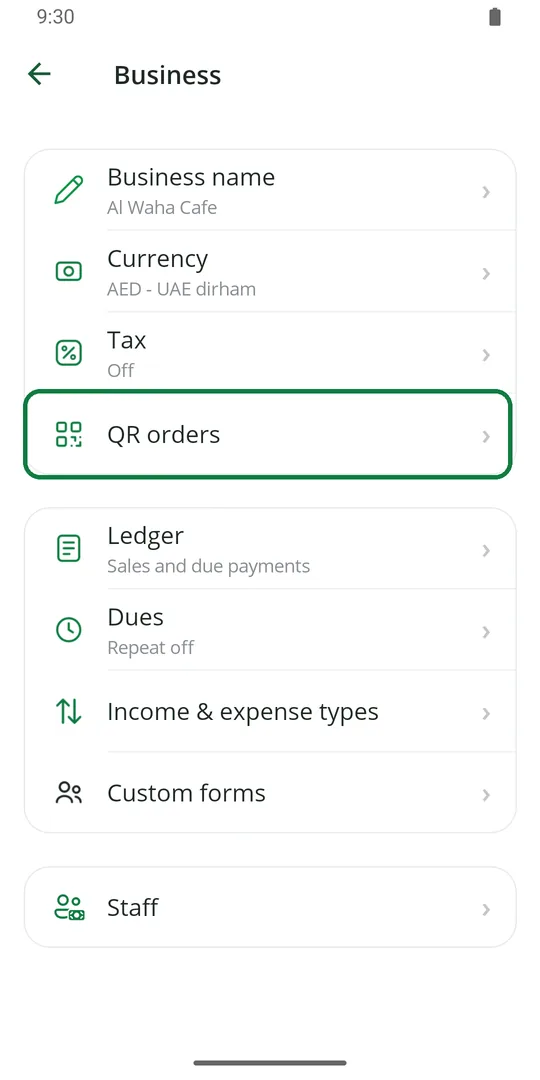
1Tap ☰, Business, then QR orders 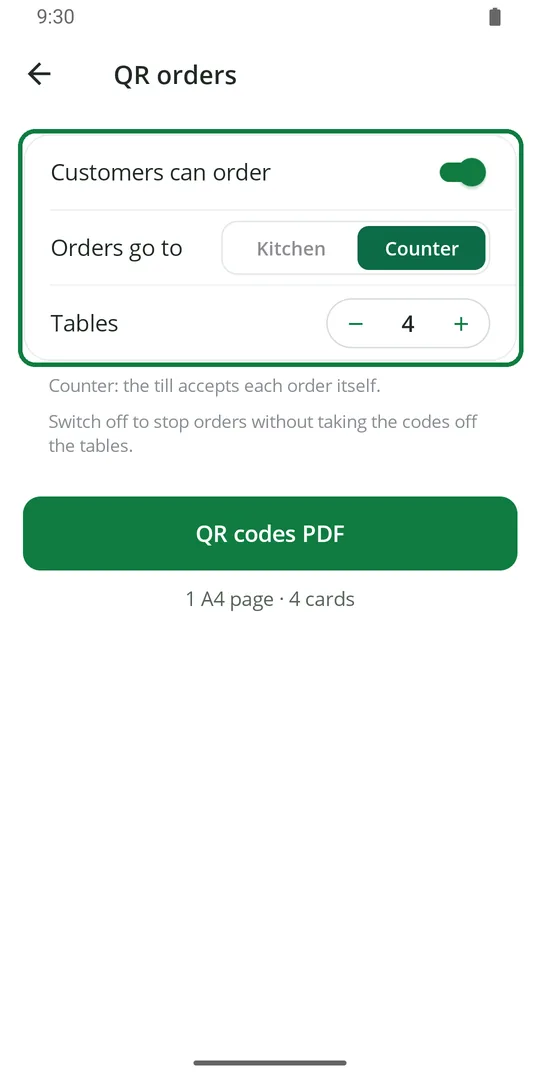
2Switch on Customers can order. Pick where orders go: Counter or Kitchen. Set how many tables you have 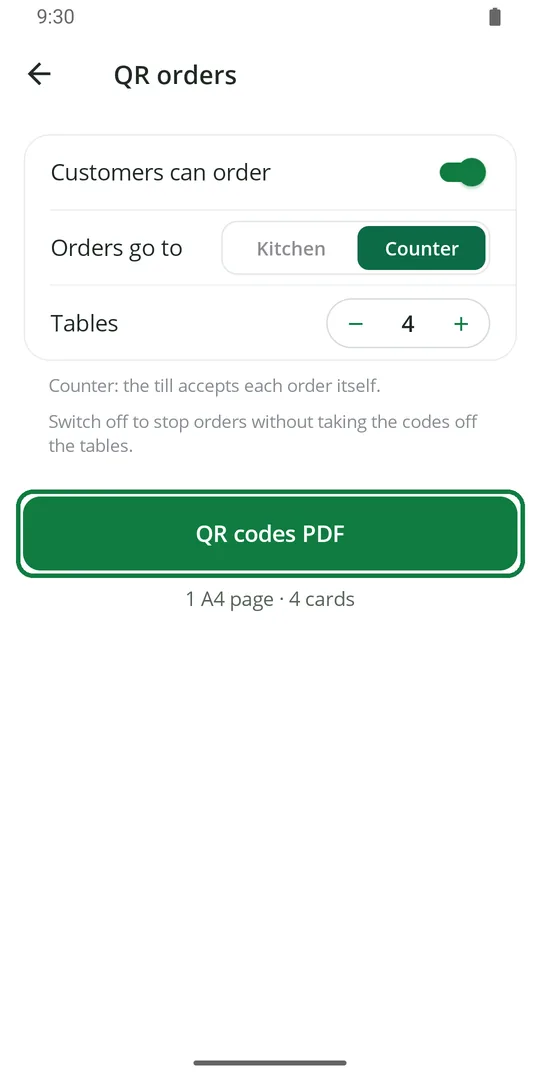
3Tap QR codes PDF and print it 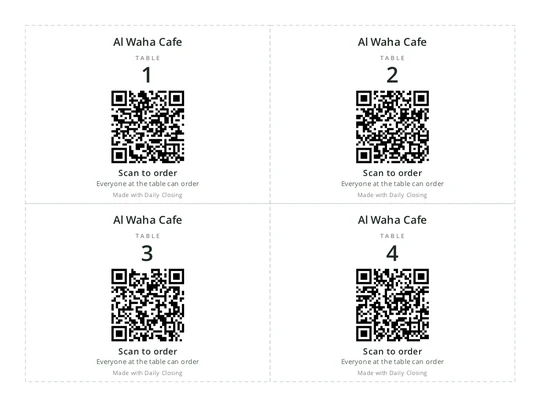
4Cut out the cards and put one on each table
QR orders are switched on for your shop by support. Ask on WhatsApp if you do not see QR orders under Business.
What the customer sees
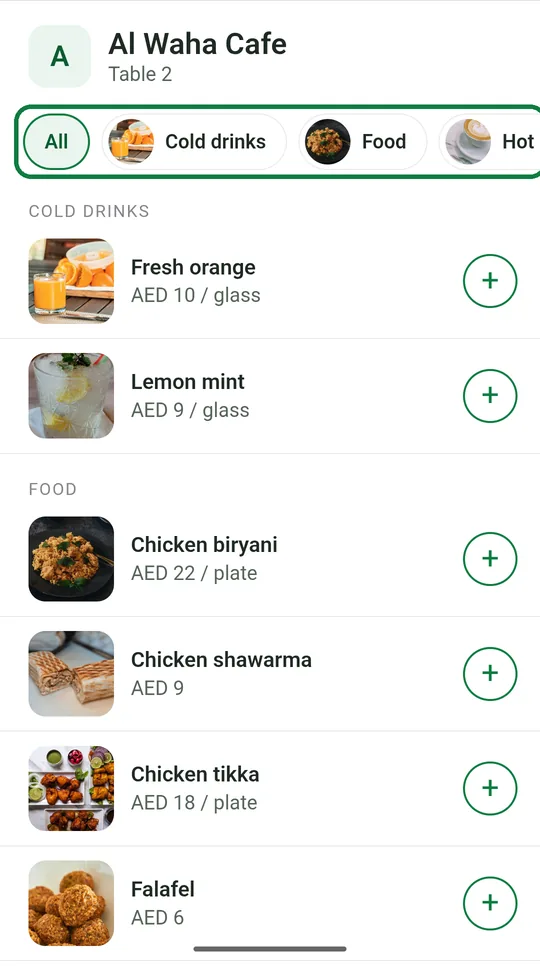
1The customer scans the card with their phone camera. Your menu opens, with photos and prices 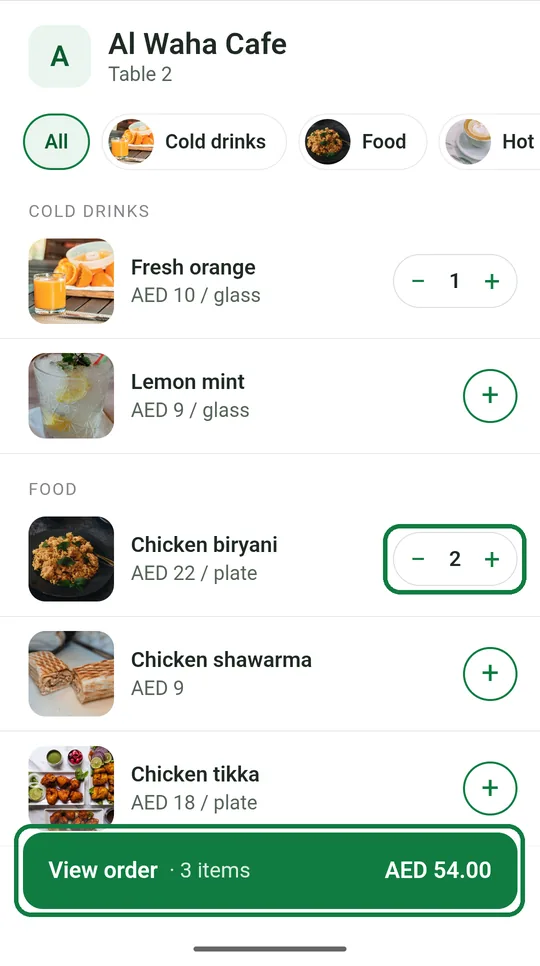
2They tap + for what they want, then View order 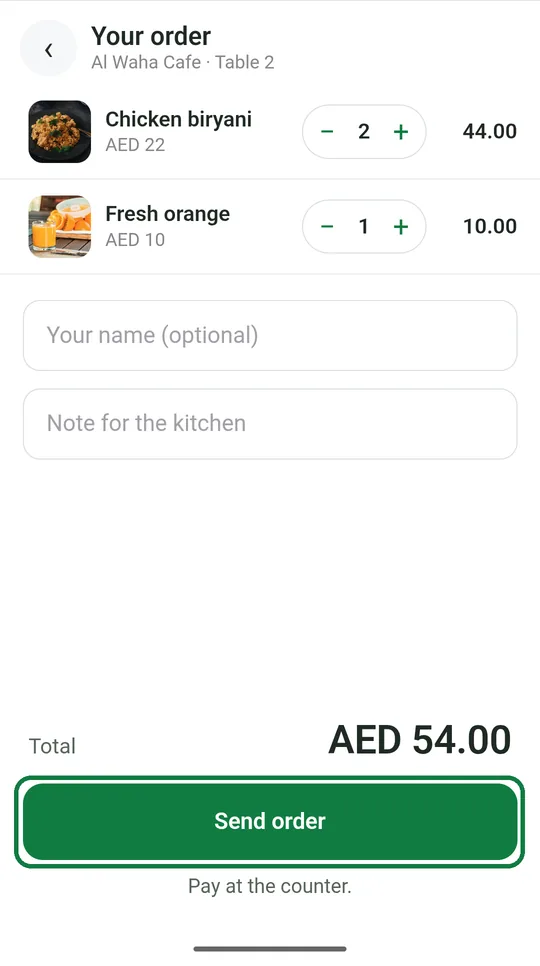
3They check and tap Send order 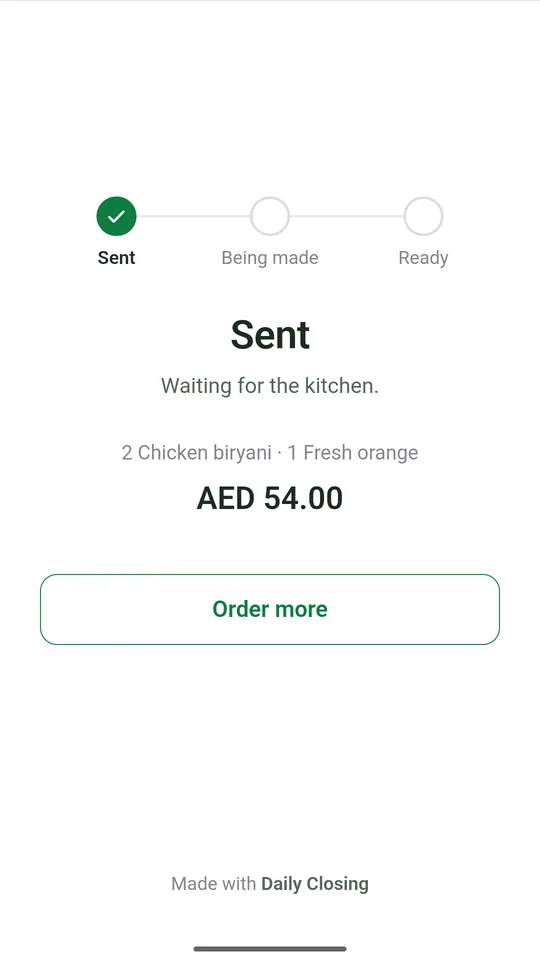
4They see when it is being made and ready. They pay at the counter
No app and no sign-in for the customer.
Take a table's order and get paid
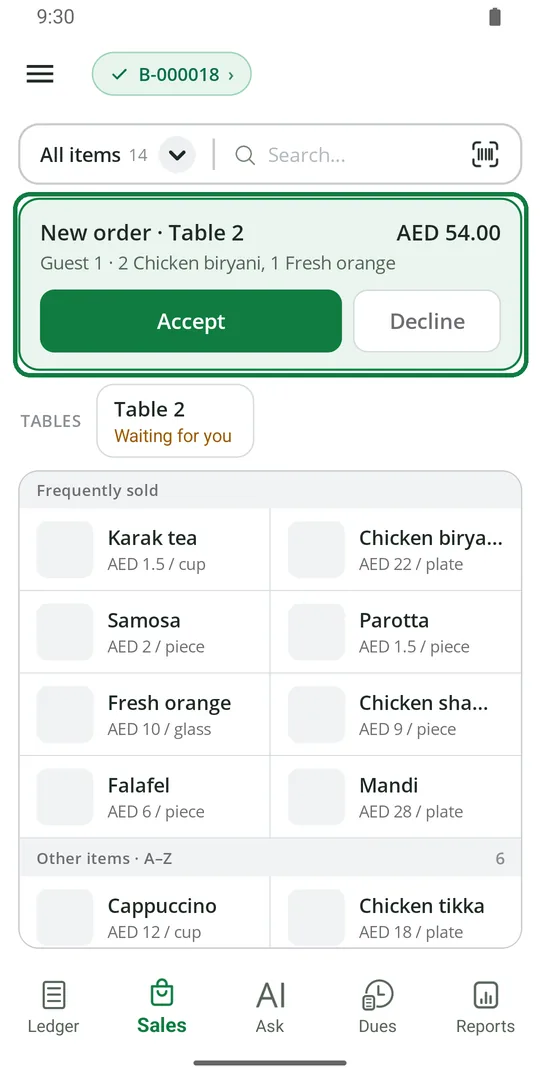
1The order shows on the Sales tab. Tap Accept, or Decline 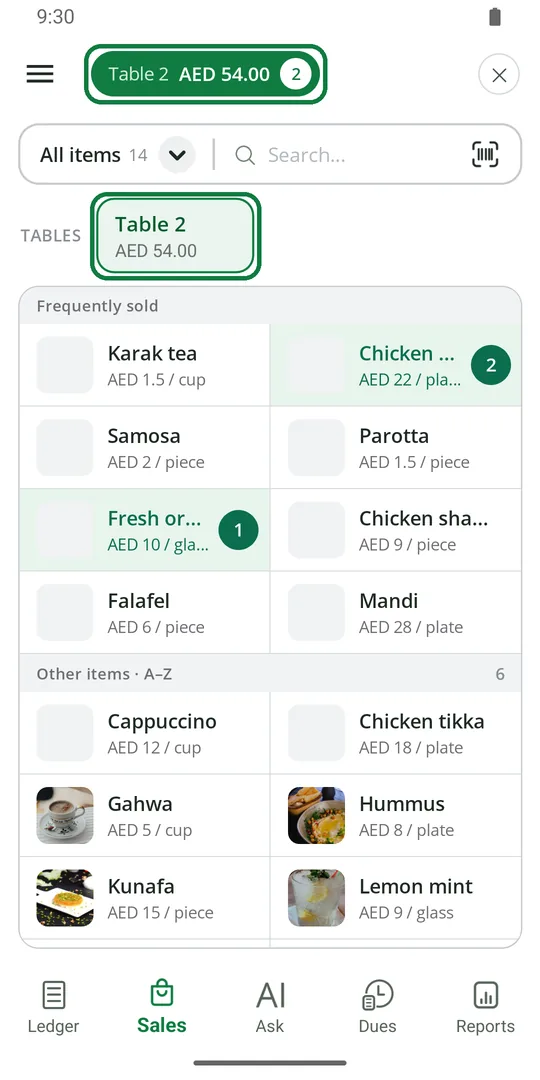
2The table's items are on the bill. Tap the table's name at the top when they want to pay 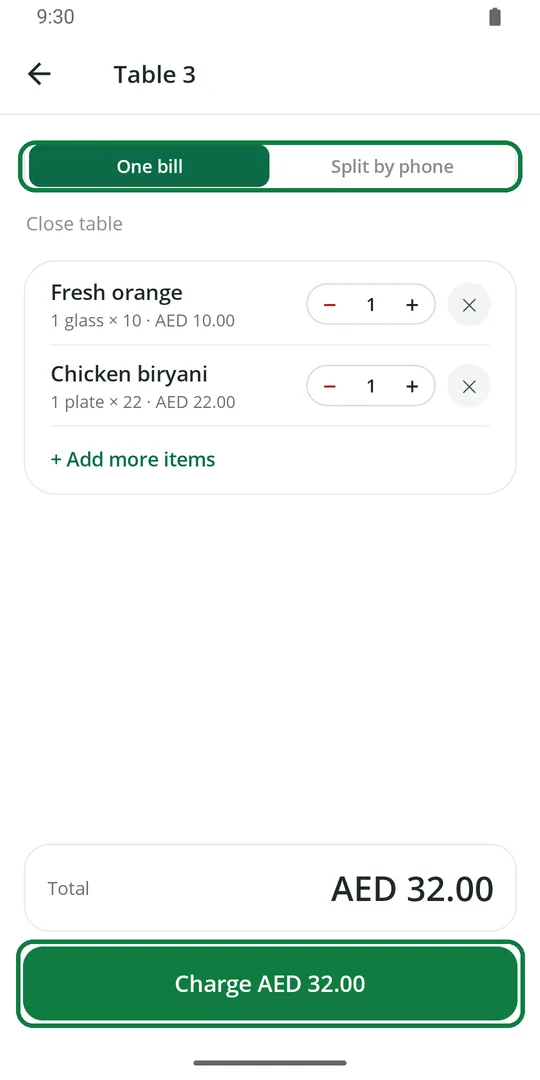
3Tap Charge, then Cash, Bank or Credit as usual 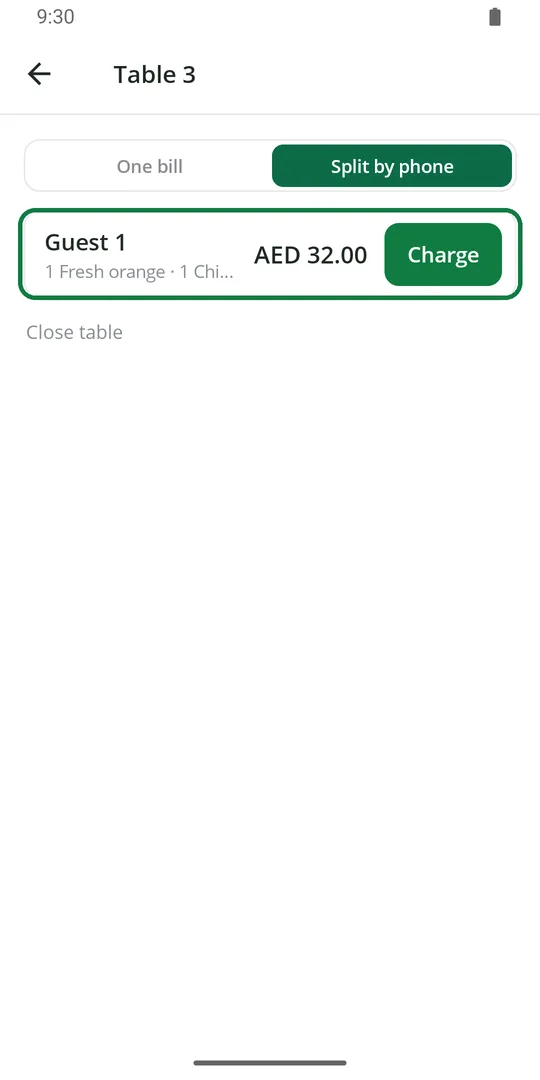
4Each phone pays for its own order? Tap Split by phone and charge each one
Nothing goes into Sales or the Ledger until you charge.
Take orders as a waiter
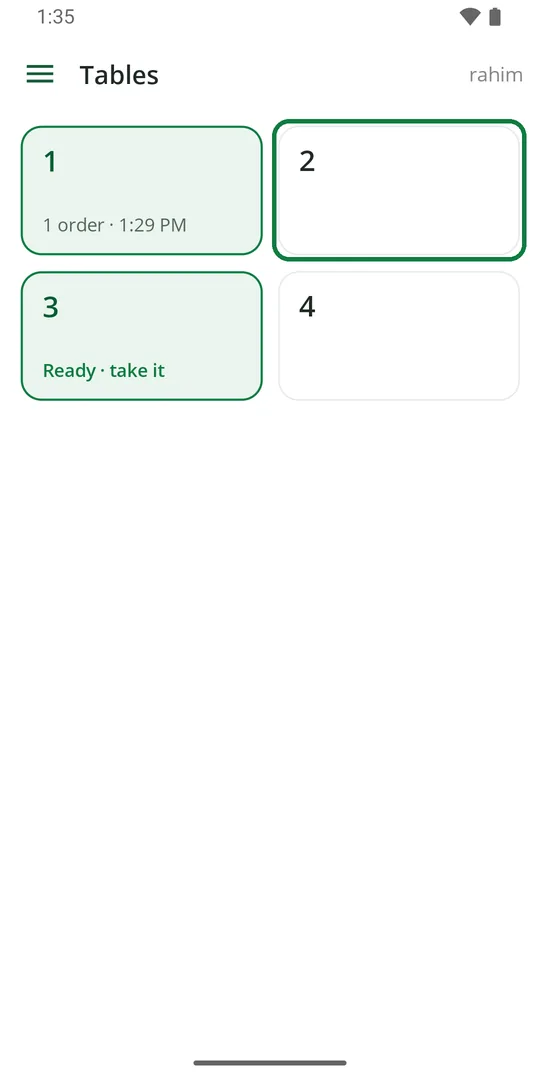
1The waiter signs in on their own phone and Tables opens. Tap the table 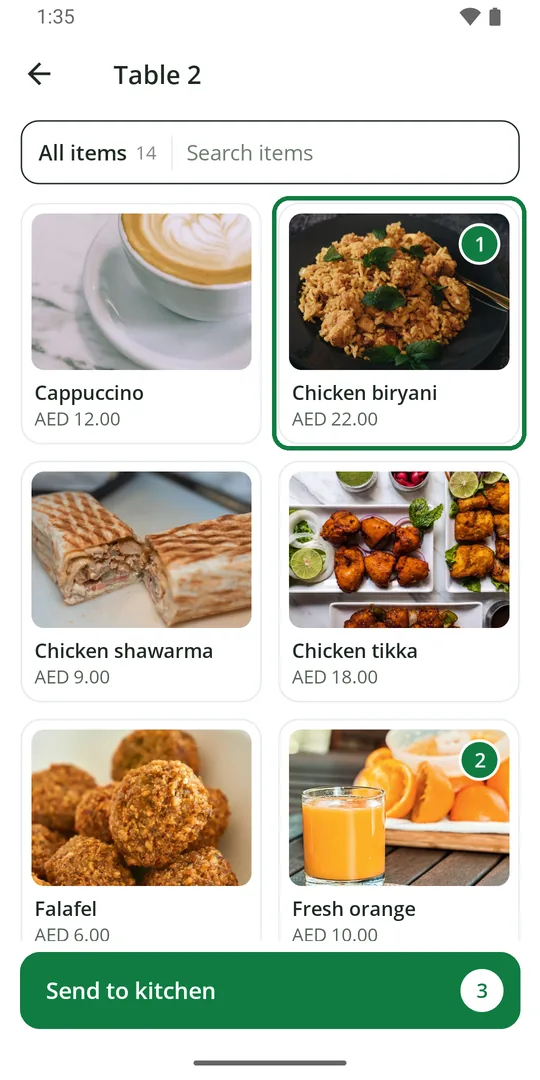
2Tap a photo to add one. Tap again to add more 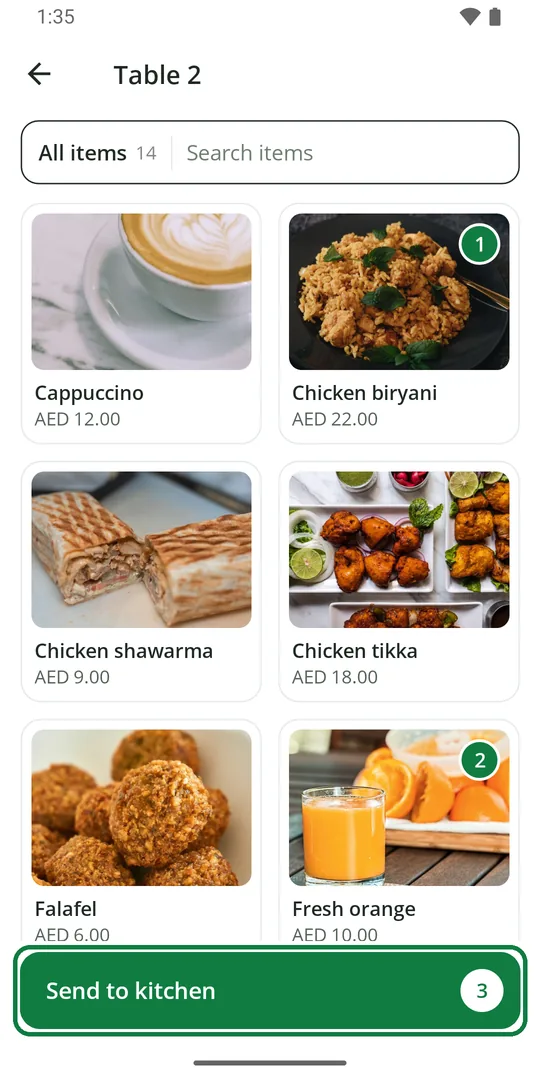
3Tap Send to kitchen 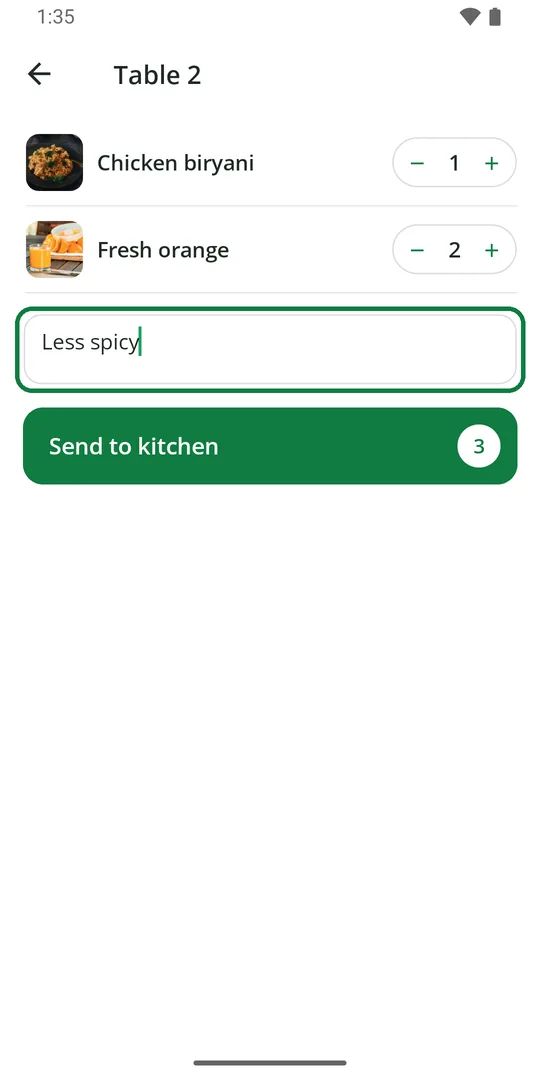
4Check the order. Change it with − and +, and type a note for the kitchen if needed 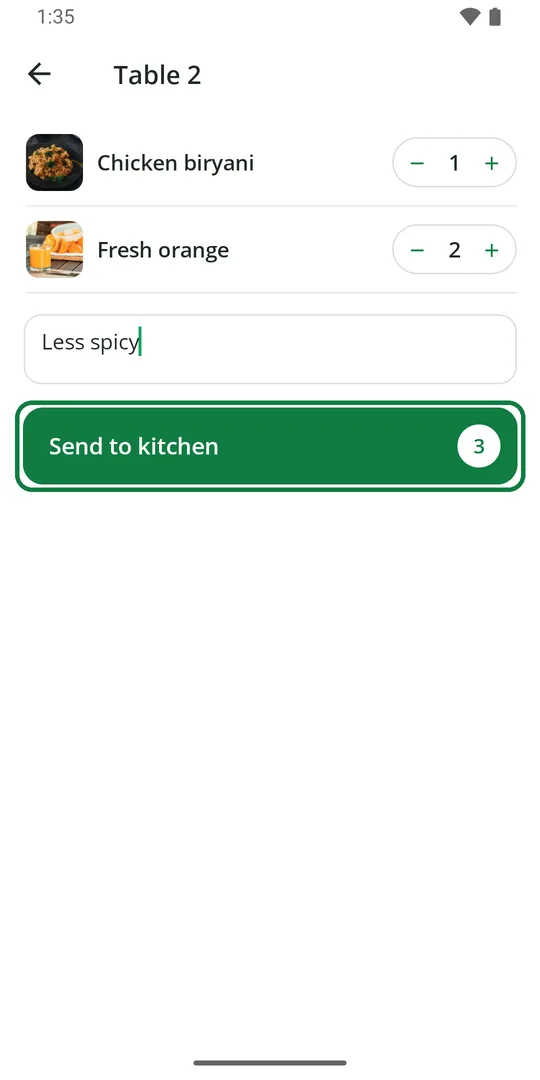
5Tap Send to kitchen 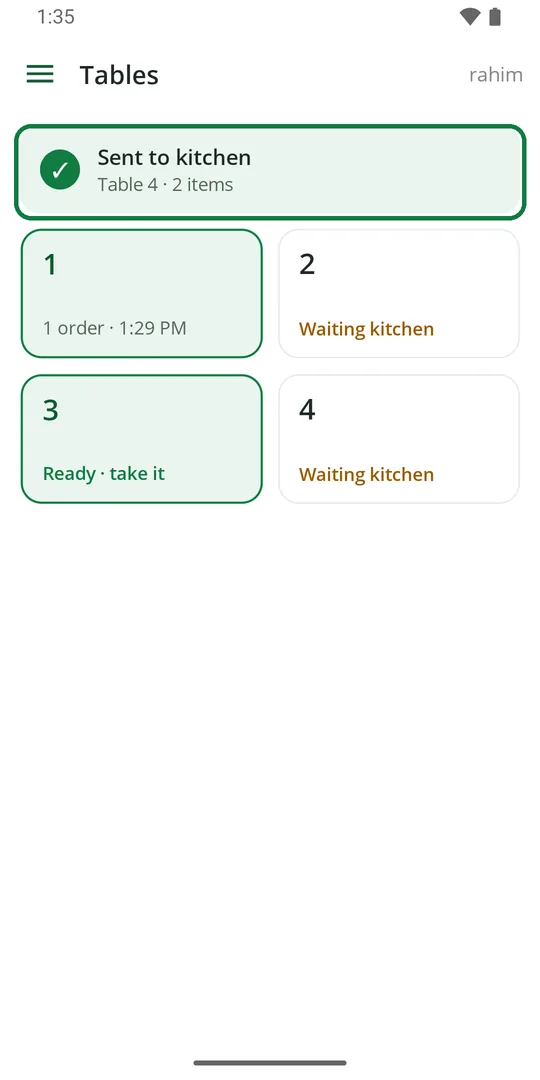
6It is sent. Tables opens again for the next table 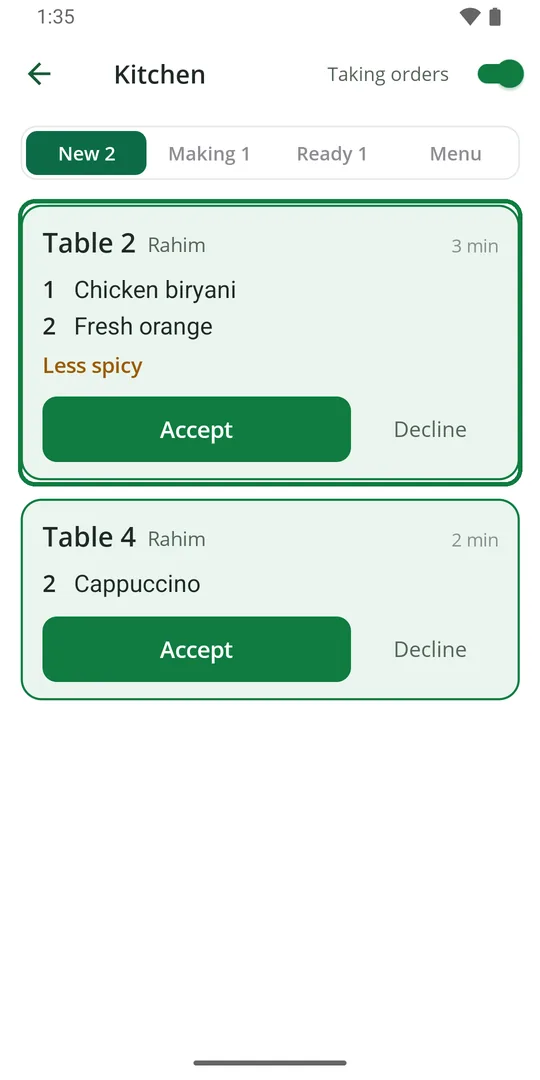
7The kitchen sees the order with the waiter's name 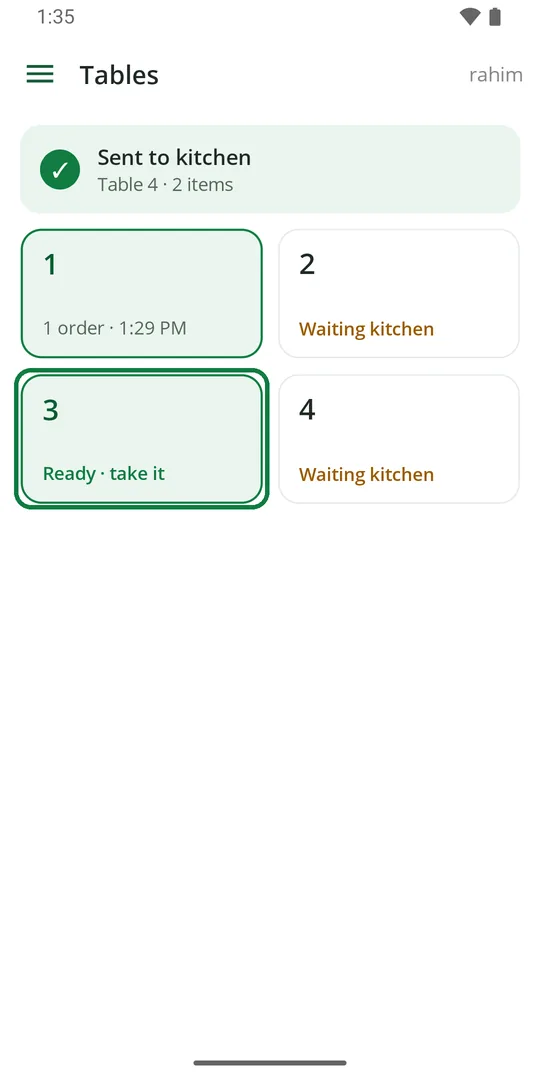
8Ready · take it means the food is ready. The phone rings too
The waiter sees tables and the menu, never bills or money. The counter takes the money as usual.